Collecting Your Placenta From The Hospital
Collecting Your Placenta From The Hospital
Aug 01, 2024
How to Guide: Collecting, Storing, and Shipping Placenta
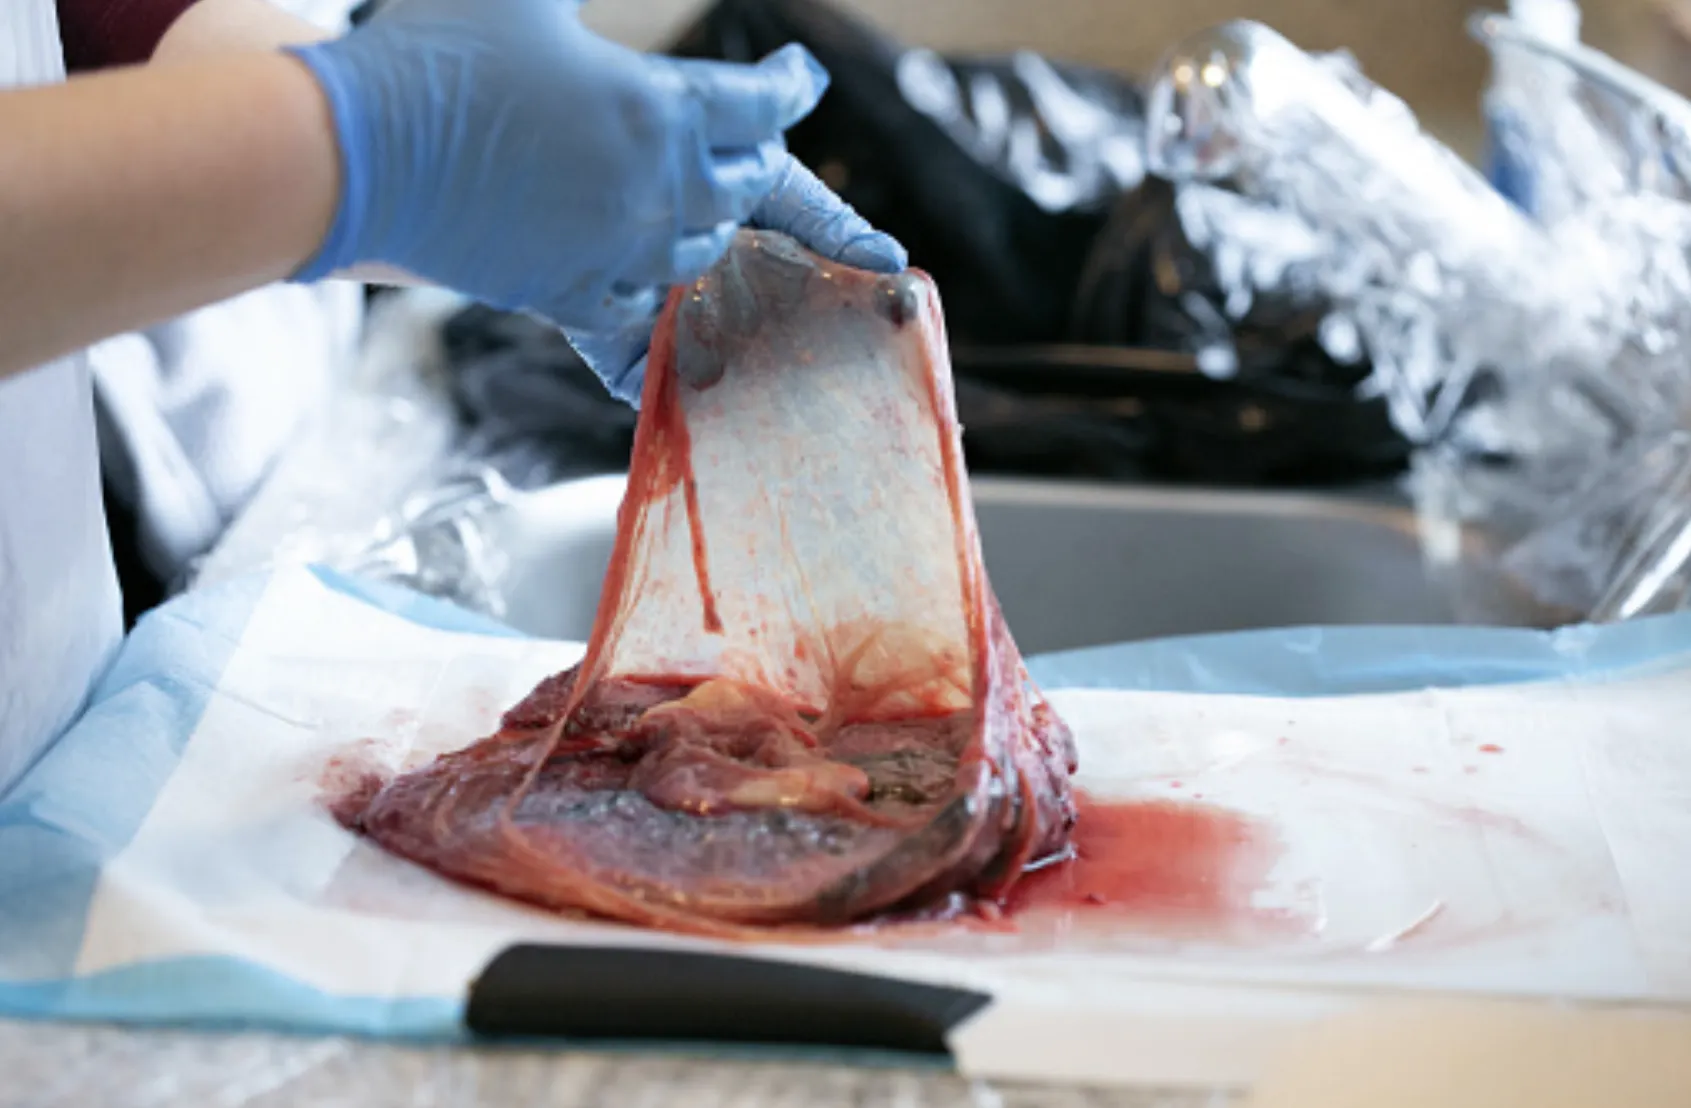
Step 1: Collecting Placenta from the Hospital.
Obtain permission: Before collecting the placenta, ensure that you have obtained permission from the hospital or birthing facility. Some hospitals may have specific protocols or requirements for placenta collection.
If the hospital suggests sending your placenta to pathology for examination, make sure you get that information to the pathology lab so you can get your placenta back once testing is done. If you want to consume your placenta, this is an important step. Placentas that are sent to pathology are not viable for human consumption.
Step 2: Prepare necessary materials: Gather the following materials beforehand:
- Disposable gloves
- Sterile, leak-proof bags or containers with tight-fitting lids
- Labels and permanent markers for proper identification
Here are Some Examples:
Double Bag Methods:
- Place your placenta in on gallon freezer safe bag
- Then try your best to remove as much air as possible and seal.
- To add an another layer of protection zip tie excess or tape down excess bag.
- Then add this into another gallon sized bag. Removing as much air as possible and sealing the bag closed.
- Label & Date with the flowing: Clients Name, DOB, Time Baby or Placenta was born, Date of birth.

For Containers:
Containers like this one are ideal for storing placentas. However, it would be better if they were slightly shorter. In general, the placenta is about the size of a dinner plate and can fit inside the container to some extent. If the container is narrow, you will need to compensate by increasing the height.
To properly store the placenta, follow these steps:
- Place the placenta in the container.
- Ensure that the lid is securely fastened, and you may add tape to the sides for added security.
- Use a plastic bag that is at least gallon-sized, or larger. It can even be a clean trash bag. Put the container inside the bag.
- Release any excess air from the bag and seal it tightly. You can use a zip tie or tape to secure the bag closed.
- Label the bag with the following information: Client's Name, Date of Birth (DOB), Time Baby or Placenta was born, and the Date of birth.
By following these instructions, you can ensure that the placenta is stored safely and securely.
Step 3. Collecting the placenta:
- Put on disposable gloves to maintain cleanliness and hygiene.
- Place the placenta in the sterile bag or container. Make sure it is properly sealed to prevent leakage.
-Place Bag or Container in another sealed bag. Then label
Step 4. Storing the Placenta:
If you are unable to bring your placenta home immediately, please ask your hospital to store it for you. If they have the capability to freeze it, that would be ideal. However, if refrigeration is the only method available, please ensure that you transfer it to a freezer within three days.
1. Transporting from the hospital:
- Keep the placenta in a cooler with ice packs during transportation to maintain its freshness.
-The placenta is very perishable, so it's important to store and transport it properly. Once you get the placenta home, the first thing you should do is take its temperature. You should then record this temperature on the temperature log that was provided to you for shipping.
2. Storing at home:
- Upon reaching home, transfer the placenta to a freezer-safe bag or container. (if needed sometimes the hospital places, placentas in larger than needed containers. Label the bag or container with the date of collection to keep track of its age)
- Store the placenta in a freezer set to a temperature below 0°F (-18°C).
-Add the date you placed in home freezer to label.
Step 5. Shipping the Placenta:
1. Preparing the shipment box:
- Select a sturdy, insulated shipping box to ensure the placenta remains protected during transit.
- Line the box with absorbent material, such as newspaper or paper towels, to absorb any potential leaks.
- Place a cooler inside the box to maintain a cold environment for the placenta.
2. Packaging the placenta:
-Take the temperature of the placenta before adding to shipping box and write in log.
- Ensure the placenta is properly double sealed in a leak-proof bags or containers.
- Place the placenta inside the cooler within the shipping box.
- Fill any remaining space with additional cold packs to keep the placenta chilled.
3. Choosing a shipping company:
- Research and choose a shipping company that allows the transportation of biological samples or medical specimens. Ensure they comply with local regulations.
- Check if the shipping company offers overnight or expedited shipping options to minimize transit time.
4. Shipping instructions:
- Contact the shipping company for specific instructions on shipping biological samples or medical specimens.
- Follow their guidelines regarding packaging, labeling, and required documentation for shipping.
Note Fedex Offers Clinical Sample Packaging here is a link to learn more:
https://www.fedex.com/en-us/shipping/how-to-ship-clinical-samples.html#3
5.Sending Tracking Information:
Once you have shipped the placenta, request a tracking number or any other relevant tracking information from the shipping company. it is required, you provide the us with the tracking information so we can monitor the shipment's progress.